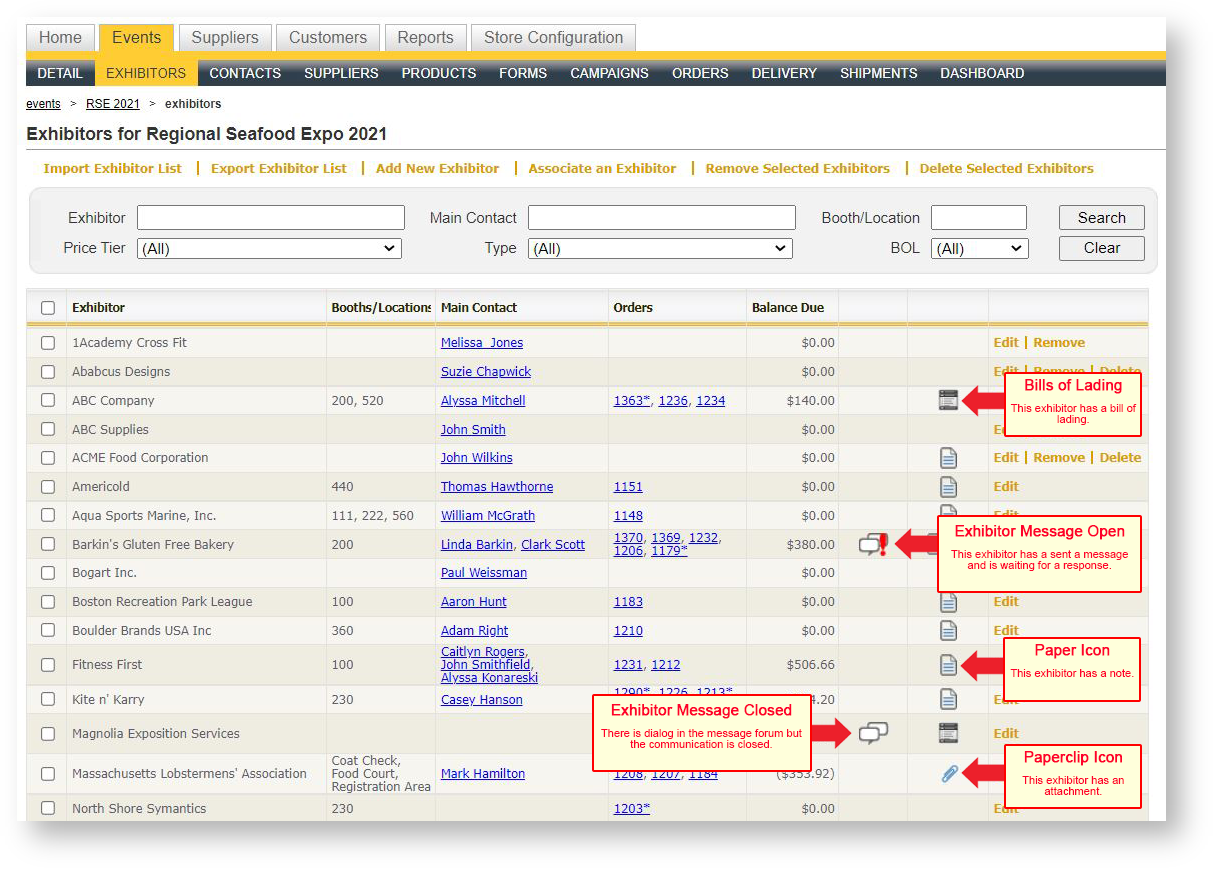
The exhibitor grid appears when the user clicks the "Exhibitors" menu option for an event:
Using the Search Area
There are five searchable fields for an exhibitor. Use one or more of these fields to enter criteria and then press the Search button. To clear all criteria values, click "Clear".
Name
Type any part of an exhibitor's company name. This is a "contains" search so the text entered here does not need to be at the beginning of the exhibitor's company name.
Price Tier
All exhibitors defined with a certain price tier (for example, "Standard", "Show Management").
Main Contact
Type any part of an exhibitor's main contact. This is a "contains" search so the text entered here does not need to be at the beginning of the contact's name.
Type
Exhibitors may be defined as an actual exhibiting company ("Exhibitor") or an EAC. Use this filter to query by type of exhibitor.
Booth
Enter a whole or partial booth number to filter on exhibitors who have booth numbers which contain the criteria.
Selecting an Exhibitor
To select an exhibitor, click anywhere on the exhibitor row EXCEPT the underlined/blue fields. Those represent hyperlinks and take you to those records instead (for example, the order or the contact).
Exhibitor Detail Form
Clicking on an exhibitor within the grid launches the exhibitor detail for the exhibitor. A sub menu for the exhibitor appears:
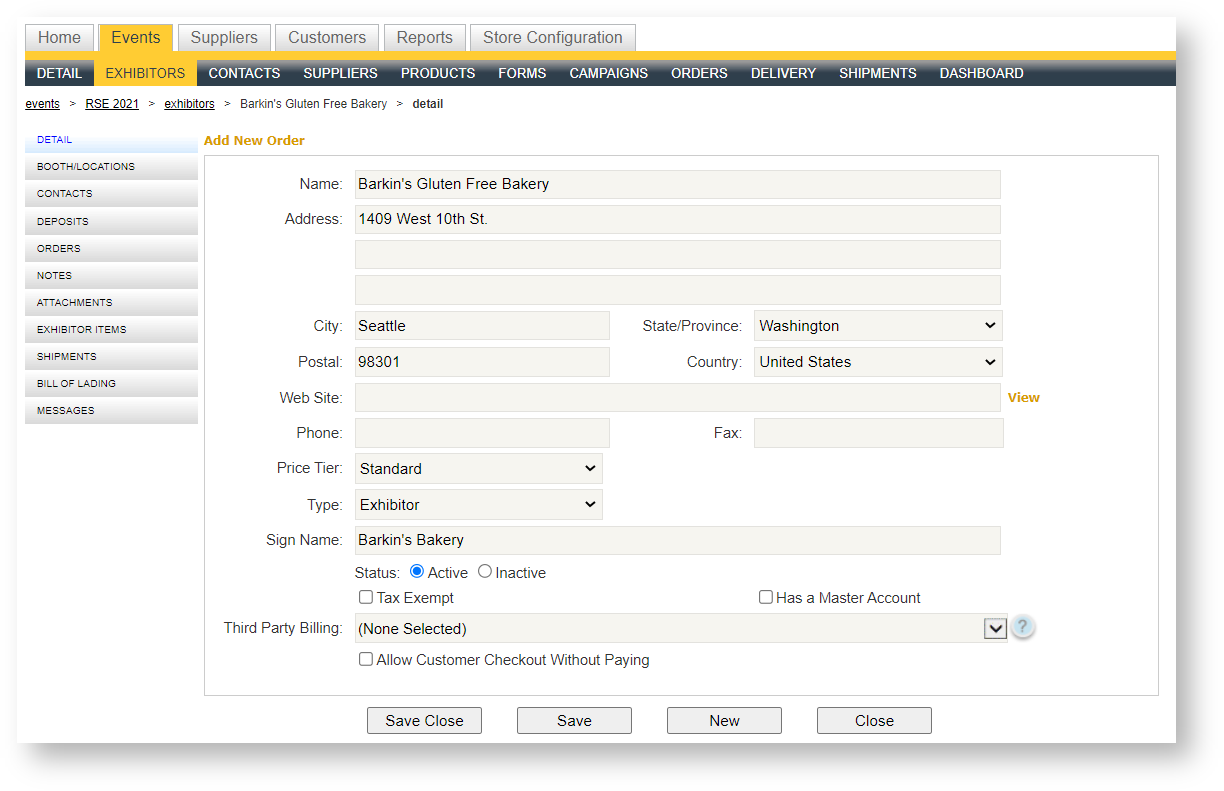
Add a New Exhibitor
Use this option to manually add an exhibitor record for a company that doesn't yet exist within Boomer. To manually add an exhibitor, click "Add New Exhibitor" above the exhibitor grid.
| Field Name | Type | Description | Default | Comments |
|---|---|---|---|---|
| Company Name | Text | Company name of the exhibitor | ||
| Address | Text | There are three separate address lines | ||
| City | Text | Exhibitor City | ||
| State | List Box | Exhibitor State | Drop down values come from Global Settings/States list, but import may add another value | |
| Postal | Text | |||
| Country | List Box | Exhibitor Country | USA | Drop down values come from Global Settings/Countries list, but import may add another value |
| Website | Text | Exhibitor Website | ||
| Phone | Text | Exhibitor Phone | ||
| Fax | Text | Exhibitor Fax | ||
| Price Tier | List Box | Available values come from the price tiers defined in Global Settings\Field List Values | Standard | The price tier determines what prices will be presented when an order is created for the exhibitor (either on the storefront or in Admin). Options are normally "standard" exhibitor or show organizer. |
| Type | List Box | Exhibitor EAC Show Organizer Extra |
Exhibitor | Represents the type of customer. Use this field to designate a third party or show organizer. Many reports use this field as an optional filter. |
| Sign Name | Text | If the exhibitor's posted sign name will differ from their company name, change this field here to the text the sign should be. | Name of the exhibitor | |
| Status | Radio Button | Active/Inactive | Yes | If an exhibitor cancels and is no longer part of the show, you will not be able to remove them if they have cancelled orders. Instead, mark the status as "Inactive". Inactive exhibitors will not appear in reports or on printed exhibitor lists. |
| Has Master Account | Check Box | Used only for hotel venues where exhibitors can post charges to a master account. | Unchecked | |
| Tax Exempt | Check Box | Indicates if the exhibitor is tax exempt | Unchecked | |
| Payment Methods | Multi-Select | Displays a list of all the payment methods that have been defined | All payment methods | This field allows you to control which payment methods are available for a customer. For example, Check might be an option for the general storefront, but you want to disable the ability of one customer to pay by check. |
| Allow an Exhibitor to Checkout Without Paying | Check Box | Determines whether to override whatever has been set at the event level |
Associate an Exhibitor
Use this command when a company already exists in Boomer, and they need to be associated to the event. This might be the case for a repeat exhibiting customer or an EAC. To associate an existing exhibitor to the event:
- Click "Associate an Exhibitor" above the exhibitor grid. A picklist appears allowing you to search using either an exhibitor company name or a contact's e-mail address:
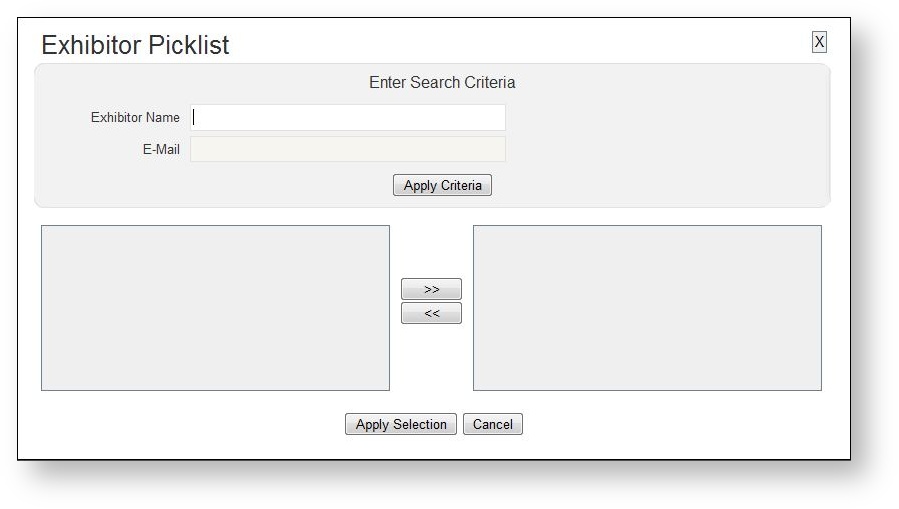
- Use either filter and click "Apply Criteria" to find any exhibitors matching the criteria.
- Double click or hit >> to move the desired exhibitor to the Picklist's right hand side.
- Hit Apply Selection.
- The exhibitor is now associated to the event.
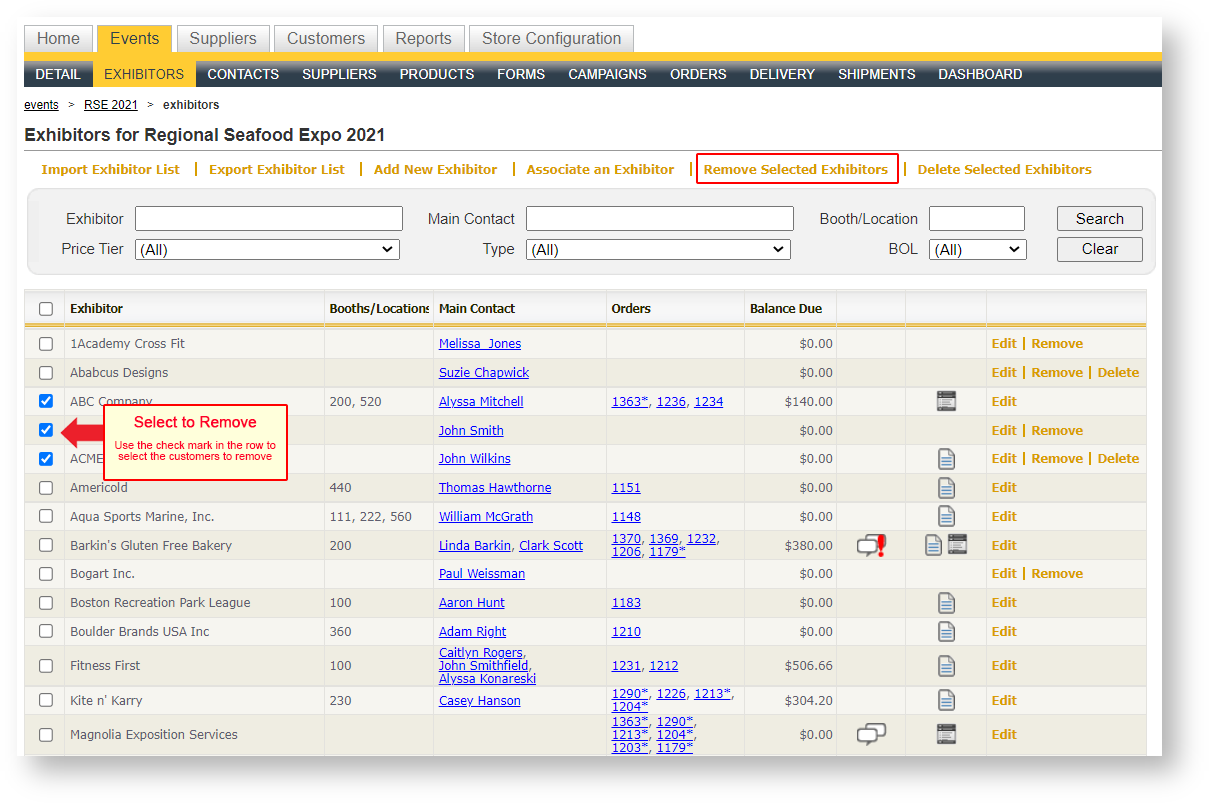
Remove Selected Exhibitors
If you need to remove an exhibitor, you can simply click "Remove" in that exhibitor row. However, if you have multiple exhibitors you need to remove, it is more efficient to use the "Remove Selected Exhibitors" command. To do this:
- Select the exhibitors you want removed by checking the box in each of the rows. Optionally use the check box in the upper left hand corner of the grid to select all.
- Click "Remove Selected Exhibitors".
Delete Selected Exhibitors
You may want to completely delete an exhibitor from your system. You can do this on an individual basis by clicking "Delete" in that exhibitor's row. If, however, you need to delete many exhibitors, it is more efficient to use the "Delete Selected Exhibitors" command. To do this:
- Select the exhibitors you want deleted by checking the box in each of the rows. Optionally use the check box in the upper left hand corner of the grid to select all.
- Click "Delete Selected Exhibitors".
Edit | Remove | Delete
These options will intermittently disappear from the grid based on certain circumstances:
Edit
Edit is available as long as the logged in user has the ability to modify exhibitors. Edit is the same as clicking on an exhibitor row and will open up the Exhibitor Detail Form.
Remove
Remove is available as long as the exhibitor does not have an order within the event and the user has a security role which allows him/her to edit an exhibitor.
Delete
Delete is available as long as the exhibitor has no orders in any event (not just this one) and only as long as the user has a security role which allows exhibitors to be deleted.
Deleting vs. Removing Exhibitors
A common question is to ask the difference between deleting and removing exhibitors. Deleting the exhibitor(s) will completely remove the company and all contacts from your system permanently.
Removing an exhibitor disassociates the company from the event but does not permanently delete it. You cannot remove an exhibitor from an event if there are orders in that event for the exhibitor.
Export Exhibitor List
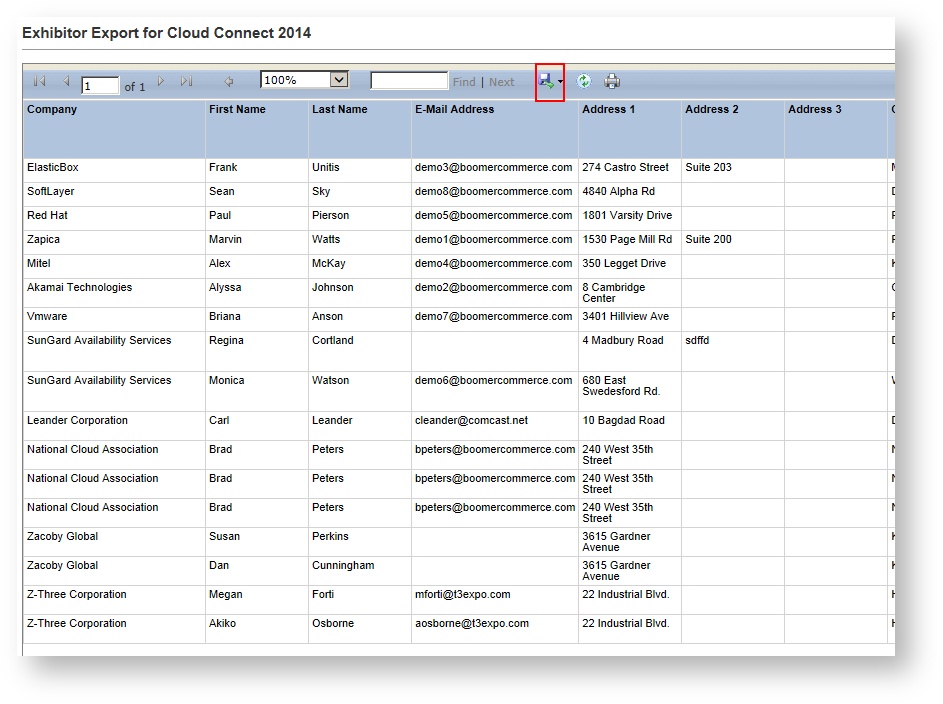
There may be an occasion where you want to export an exhibitor list from Boomer. One great example is if you have many changes you'd like to make such as adding booth numbers. While you could open each exhibitor and/or order to make adjustments, it is more efficient to export an exhibitor list, make the changes in Excel, and then re import the changes back into Boomer. To export:- Open the event and click on the Exhibitors tab
- Click "Export Exhibitor List" (note: security controls this option so if it is not visible above your Exhibitors grid, you do not have sufficient security rights to export a list)
- A new dialog pops up with the exported list Click the blue disk at the top to export the list and choose Excel:
Make any adjustments in Excel as necessary. To learn how to import an exhibitor list, see Importing an Exhibitor List.