What to Update in the Event Detail Form
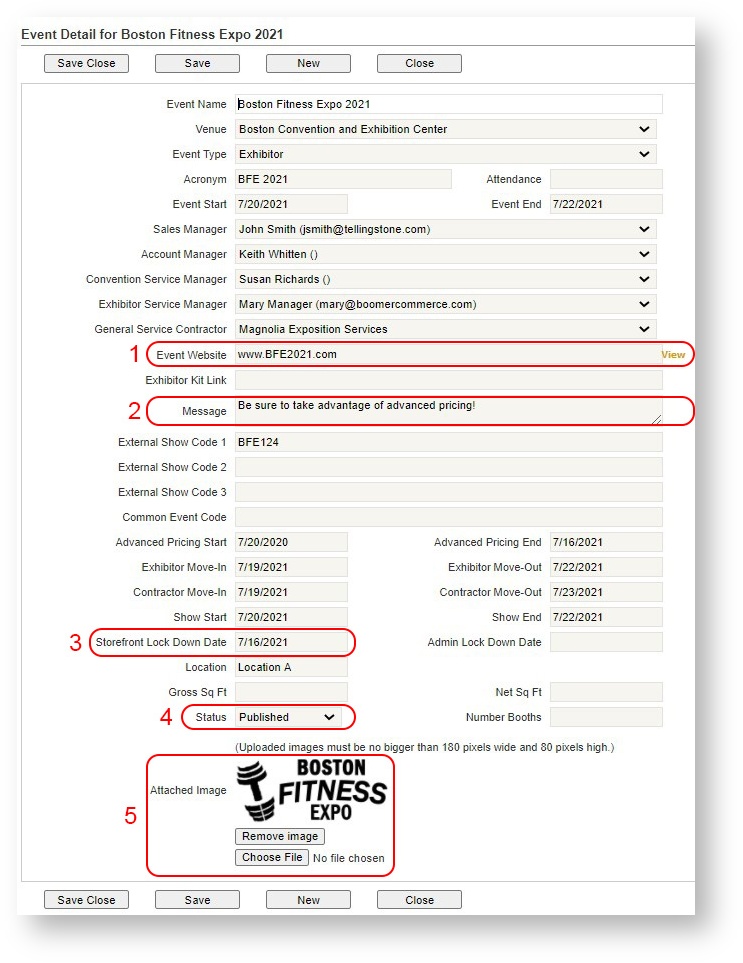
There are five fields to update on the event detail form that control how an event appears on the Storefront. Four of them are optional:
| Field | Description |
|---|---|
| 1. Event Web Site | Optional: Put the event's URL in the Event Website field. When an exhibitor shops on the storefront, he/she can click on the event's logo and access the main web site. To test the URL, click the "View" option to the right of the field. |
| 2. Message | Optional: Enter the text you would like the exhibitor to see when searching for an event or viewing the details in their "My Account" area. |
| 3. Storefront Lock Down Date | Determines the date after which orders may not be created or modified by the exhibitor on the storefront. |
| 4. Status | Required: Published/UnPublished. Defaults to UnPublished. When you are ready to make the event available to exhibitors, change the status to "Published". |
| 5. Logo | Upload a logo that represents the event. It is important the logo be no larger than 180 pixels wide or 80 pixels high. Otherwise, the logo will get cut off. Either ask Show Management for a logo of that dimension, or see this popular Wikihow topic on how to use Microsoft Paint (which ships free with Microsoft Windows): http://www.wikihow.com/Resize-an-Image-in-Microsoft-Paint |