Master accounts (or city ledgers) are established with larger customers and basically represent lines of credit with the venue. These are pre-approved through the Accounting or Finance division and are established with limits. For customers who wish to charge orders to established master accounts, two actions are required in Boomer Admin for that customer.
The Master Account payment method will also need to be configured under Global Settings. An administrator with appropriate access will need to following instructions here. If "Master Account" is still not visible after following Steps 1 and 2 below, the payment method of Master Account has not been configured.
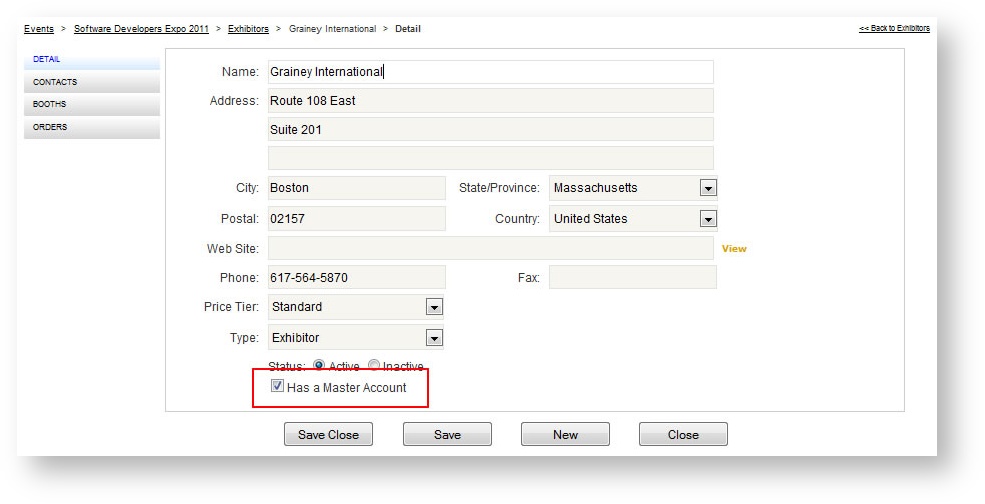
Step 1: Enable the Exhibitor
To indicate that an exhibitor (usually the show organizer) has a master account, check the "Has a Master Account" check box in the exhibitor record:
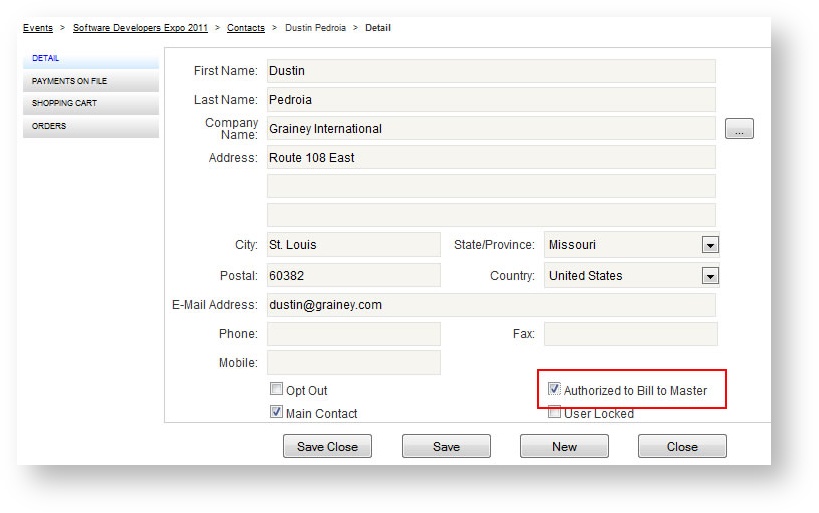
Step 2: Authorize the Contact
Indicating that an exhibitor has a master account does not give all contacts connected to that exhibitor the rights to charge to the account. For security purposes, authorization needs to be given to individual contacts to bill to a master. To do this, check the flag flag in the contact record as "Authorized to Bill to Master:
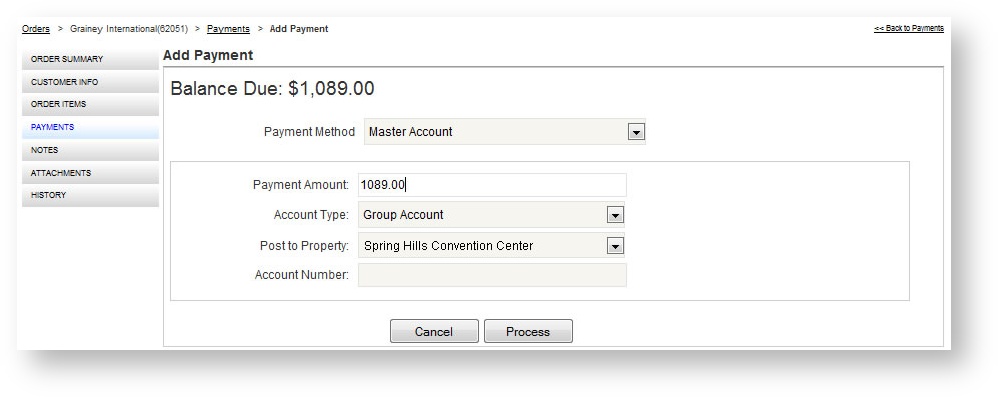
Step 3: Use Master Account at Checkout
Once a user has been authorized to bill to a master account, that payment method becomes available when applying a payment. To apply a payment to a master account:
- Open the order and go to Payments.
- Choose "Master Account" from the Payment Method field.
- Enter the amount to charge in the Payment Amount field.
- Enter the account type, property and account number.
- Click "Process"