Boomer Bundles allow you to configure a single (parent) product that automatically add others products (child products) to an order. Bundles can be very simple or extremely complicated but in all cases are extremely powerful and big time savers for you and your customers. For example, bundles may be used for:
- Generic custom exhibit packages you offer where the customer pays a single price for multiple products;
- A show specific package where the exhibitor needs to communicate colors and quantities for a package provided by show management;
- A show management booth configuration where corner booths and/or in line booths require components that you want to appear on your pull/delivery lists; and
- Any other way you can think to combine products together to come up with a single price product.
Set up a Bundle in a Supplier
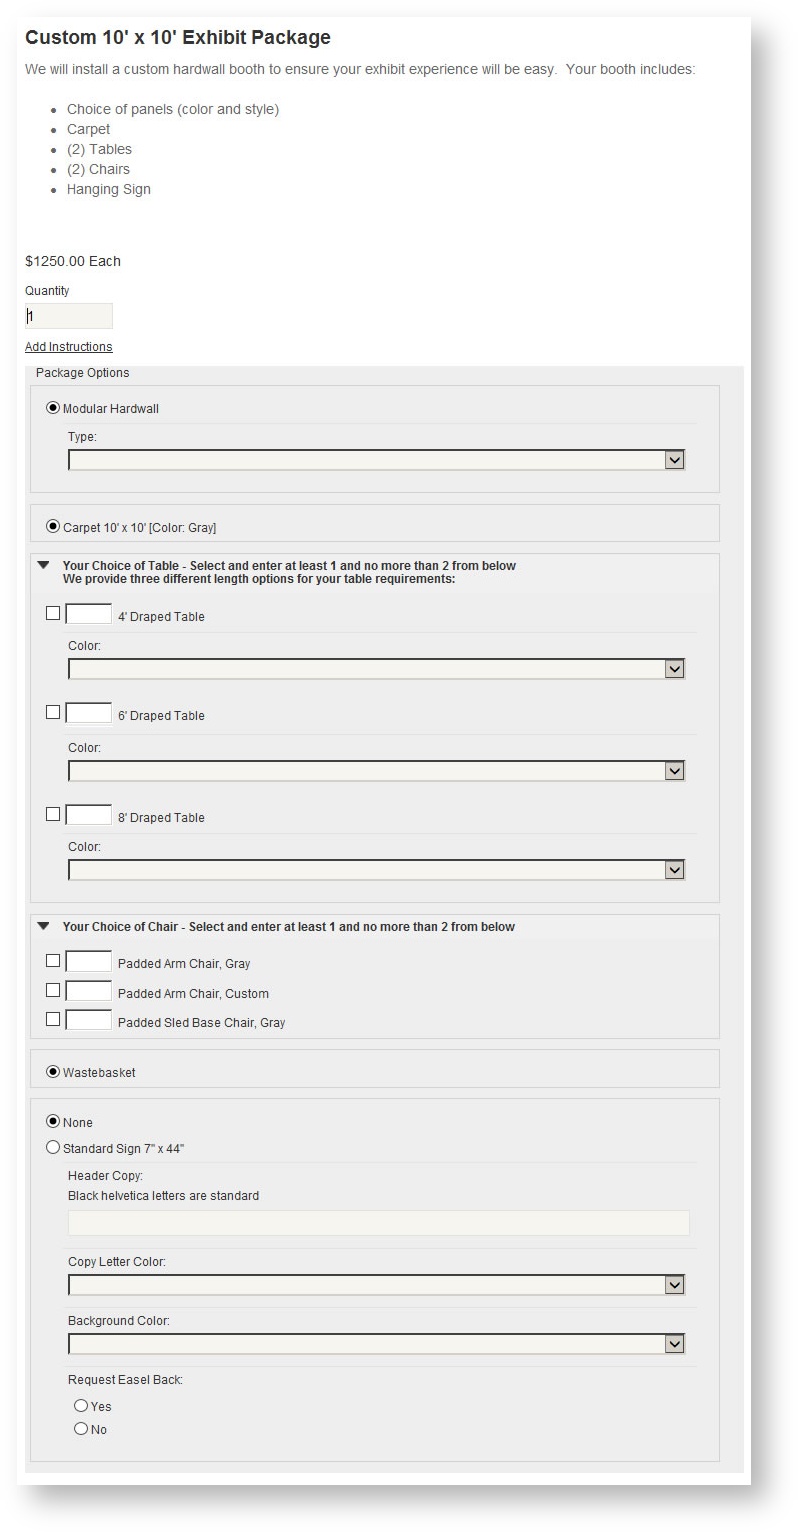
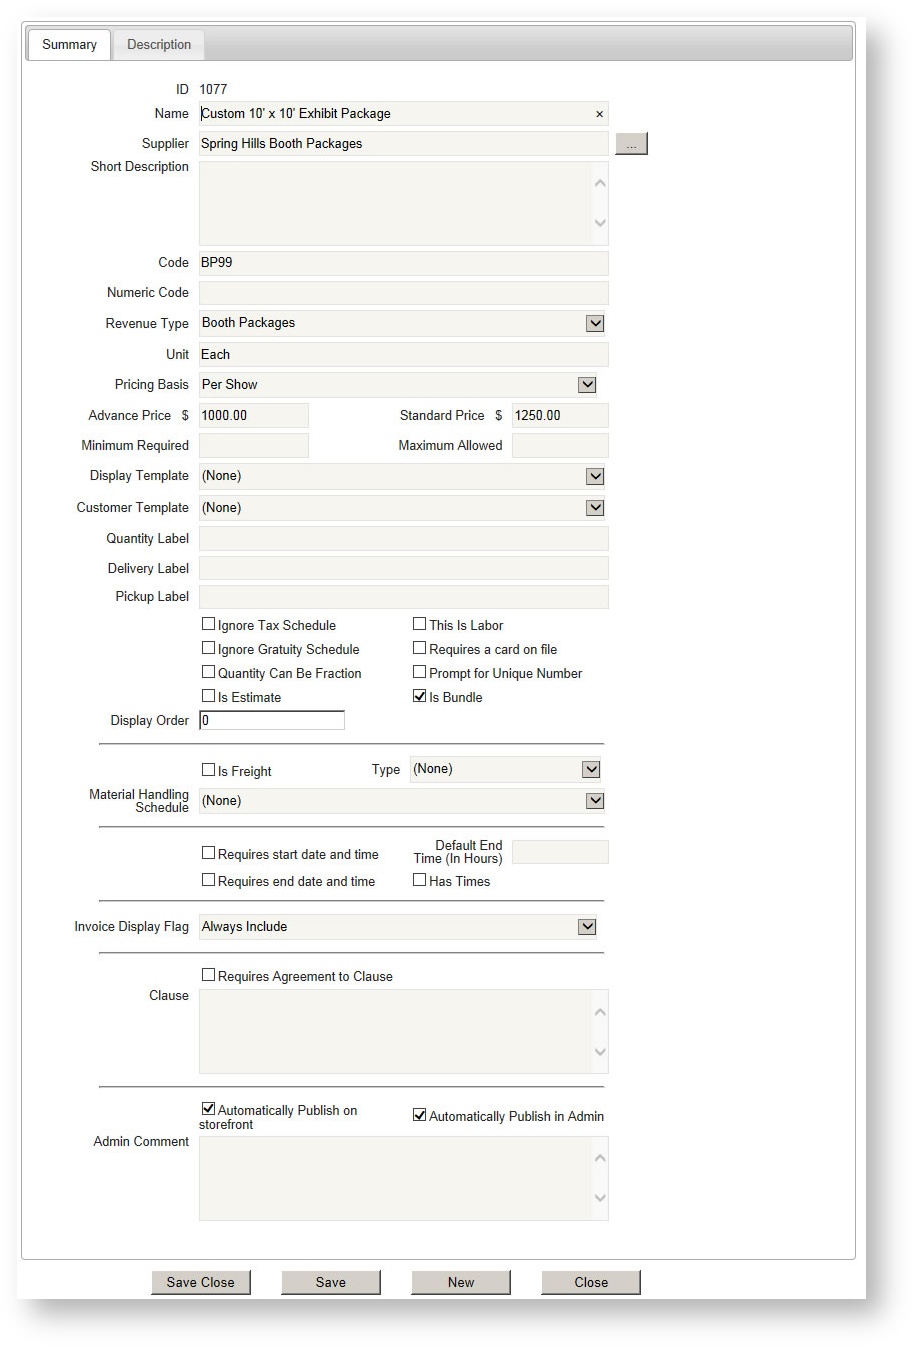
Create a bundle as you would a normal product (see Creating Products). When defining the product, check "Is Bundle" as explained in the link. You can also create a new package from an existing package by copying it (see Copying Products). Your package might look something like this:
Add a Description to the Bundle
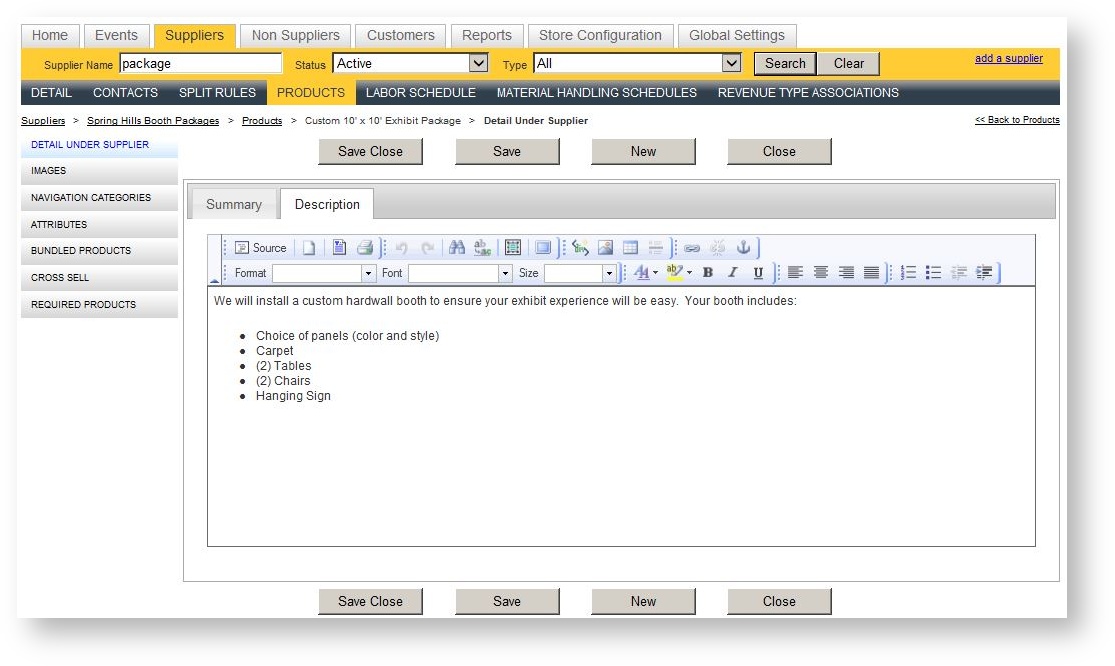
If you want to describe details about what is available in your bundle, click on the Description tab of the bundle product and enter them there. These will appear on the storefront:
Add Child Products to the Bundle
To add a child product to your bundle:
- Open the product in detail and click "Bundled Products" down the left hand navigation menu.
- Click "Associate Products to this Bundle" above the Bundled Items grid.
- Search for and choose the first product in the Picklist. Move it to the right hand side in the Picklist.
- Click "Apply Selection" to bring your child product into your bundle.
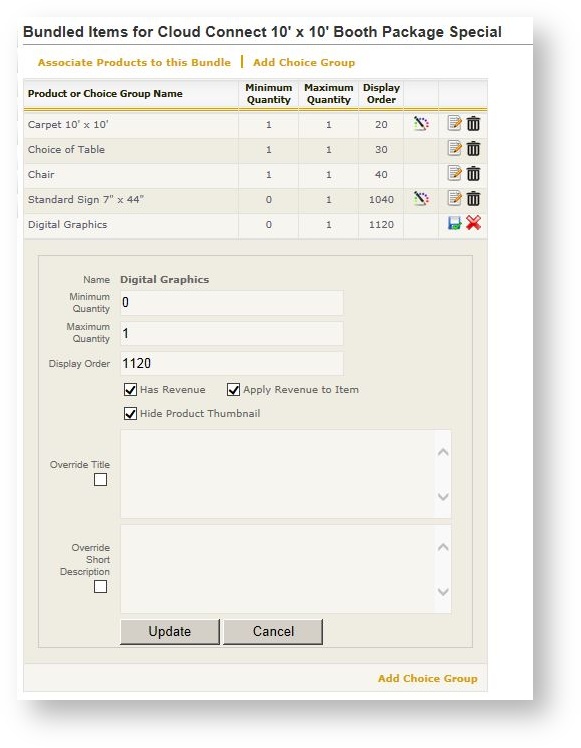
Once you follow the above steps, you will see the product in the Bundled Items grid:
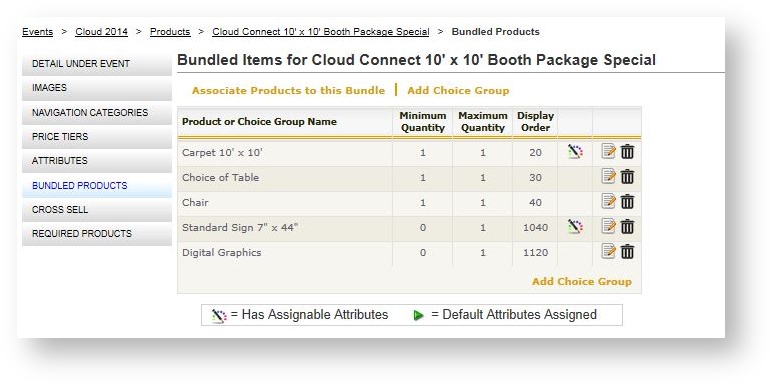
When the product is associated to the bundle, you will see the following fields in the grid. You can edit them to change its value by clicking the Edit icon (![]() ).
).
| Value | Description |
|---|---|
| Minimum Quantity | The minimum number of this product the customer may choose. If the product is optional, put 0. |
| Maximum Quantity | The maximum number of this product the customer may choose. If they get a specific quantity and can't choose the quantity, make the minimum and maximum quantity the same. |
| Display Order | Defaults to the product's display order when it stands on its own. You may edit the display order here for the order in which it will appear within the package without disturbing the default display order of this product. |
| Has Revenue | Check this option if this product adds to the base bundle price. If selected, the product's defined price in the event will be added to the bundle's overall total. |
| Apply Revenue To Item | Check this option if in addition to the product adding revenue to the bundle (as explained in "Has Revenue" above) the revenue should be added in the revenue category of the product itself (for example, graphics) instead of the bundle revenue type. |
| Hide Product Thumbnail | Check this option if you don't want an image to display on the storefront next to the bundle item. |
| Override Title | Check this option and enter a value in the text box if you want to override the name of the product for this bundle only. |
| Override Short Description | Check this option and enter a value in the text box if you want a different description for this product in the bundle only. |
If a product has attributes, an icon (![]() ) displays in the second to the last column. Clicking on this icon brings up a dialog which allows you to choose a default selection of the attribute if desired.
) displays in the second to the last column. Clicking on this icon brings up a dialog which allows you to choose a default selection of the attribute if desired.
Add a Choice Group
Use a choice group if a customer has the option to select among different products within a category (for example, type of table, or type of chair). To add a choice group:
- Click "Add Choice Group" above the Bundled Items grid.
- Fill in the choice group fields using the table below as guidance about the meaning of the fields.
- Click Save.
| Field Name | Description |
|---|---|
| Name | Name as the choice group will appear to the customer |
| Minimum Quantity | The minimum number of this product the customer may choose. If the product is optional, put 0. |
| Maximum Quantity | The maximum number of this product the customer may choose. If they get a specific quantity and can't choose the quantity, make the minimum and maximum quantity the same. |
| Display Order | The display order in the context of the other child items in this bundle. |
| Initially Collapsed | Controls whether the choice group appears initially collapsed on the storefront and the user opens it in order to make choices. This can be useful if the bundle has several choice groups. |
| Description | The description the customer will see immediately below the name. |
Add Products to a Choice Group
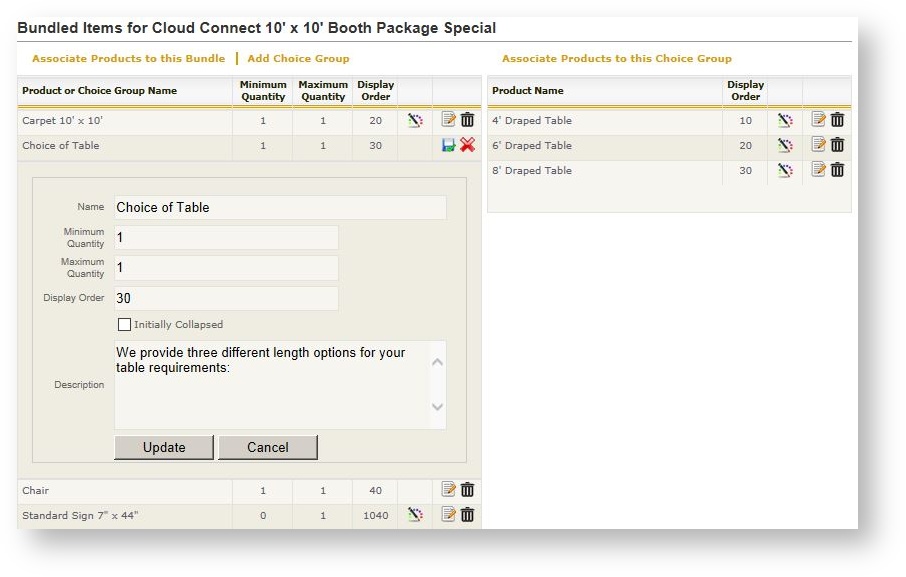
To add products to a Choice Group:
- Click on the choice group in the Bundled Items grid. A new grid appears on the right.
- Click "Associate Products to this Choice Group in the grid on the right. A Product Picklist appears.
- Search for and choose the items to be a part of this Choice Group. If you need to search for different products, hit "Apply Selection" first and then re-click "Associate Products to this Choice Group" to choose more.
As with regular child products, if a product in a choice group has attributes, a ![]() appears. Click on the icon to define a default attribute for the product if desired.
appears. Click on the icon to define a default attribute for the product if desired.
Here is the finished bundle as it will appear on the storefront: